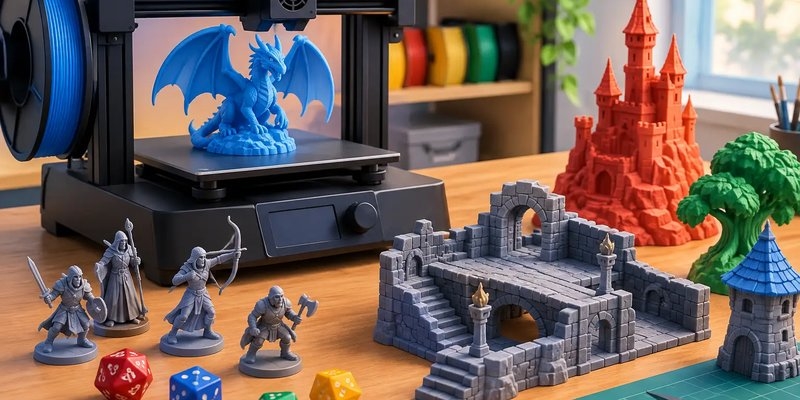
3D Printing for Tabletop Games and Makers
A ruined chapel that fits your Warhammer battlefield, a tray that stops dice rolling under the couch, a deck box insert sized for double-sleeved Commander cards: 3D printing can make all three without asking a hobbyist to settle for a one-size-fits-all solution. That freedom is the appeal. It is also why the best results come from matching the printer, material and finishing work to the job rather than printing the first cool file you find.
For tabletop players, painters and makers, a printer is less about producing flawless display pieces at the push of a button and more about adding another useful tool to the hobby bench. It can save time, solve awkward storage problems and bring a terrain board to life. It can also produce failed prints, require calibration and leave you with cleanup to do. Knowing where each print method shines makes the difference.
What 3D Printing Can Add to Your Hobby
The most practical projects are often the ones you cannot easily buy. A roleplaying group might want scatter terrain scaled for its favourite system, while a miniature painter may need paint-bottle racks, brush holders or a compact handle for holding models. TCG players can print token organisers, dividers, deck box inserts, card display stands and storage labels tailored to their own collection.
Terrain is a particularly strong fit. Hills, ruins, walls, dungeon tiles and objective markers can be produced in repeatable sets, then painted to match an existing collection. If you play multiple games, modular pieces are worth considering. A well-planned set of clip-together walls or generic sci-fi containers can work for skirmish games, RPG encounters and display tables alike.
There is a sensible boundary here. Designs should respect the intellectual property and community rules around the games you play. Printed accessories and original scenery are usually a straightforward hobby project, but event organisers and game systems can have specific policies on proxies, models and tournament pieces. Check before putting a print on the table, especially for organised play.
FDM vs Resin 3D Printing
Most hobbyists choose between FDM and resin printing. Neither is simply “better”. They produce different kinds of results, demand different working conditions and suit different projects.
FDM printers: terrain, organisers and practical parts
FDM printers melt filament and build an object layer by layer. They are the familiar workhorse for large terrain, storage solutions, cosplay components and functional accessories. PLA is a popular starting filament because it is straightforward to print, comes in a huge range of colours and is well suited to dungeon tiles, deck holders, terrain buildings and paint stations.
Layer lines are more visible on an FDM print than on a resin print, particularly on curved surfaces or detailed faces. For a stone wall, cargo crate or modular terrain floor, that is rarely a problem. Texture, primer and paint can make the lines almost disappear. For a 32 mm character miniature with fine chainmail and facial detail, they are much more noticeable.
PETG is a useful step up when you want a tougher part with a little more heat and impact resistance, such as storage clips or workshop accessories. It can be less forgiving than PLA and tends to need more attention to stringing and settings. Flexible TPU is excellent for specialist jobs, but it is not the material most beginners should load first.
Resin printers: detailed miniatures and small parts
Resin printers use UV light to cure liquid resin in very fine layers. They are the usual choice for detailed miniatures, busts, small scenic elements and intricate accessories. A good resin print can capture sharp armour trim, textured cloth, tiny faces and delicate basing details that would be difficult to achieve with a standard FDM nozzle.
The trade-off is handling. Uncured resin requires gloves, controlled cleanup and proper curing. You need a suitable ventilated work area, a wash-and-cure process and a plan for disposing of contaminated materials safely. Resin is not something to rinse into the sink or leave exposed on a desk beside your paints.
Resin prints can also be more brittle than filament prints, although tougher resin formulations are available. A detailed dragon is a great resin project; a large terrain building that will be handled every game night may be cheaper, lighter and more durable in filament.
Choosing Filament for Tabletop Projects
Material choice should follow the job. Start with what the object needs to do, then consider how much finishing you want to undertake.
PLA is the sensible default for most FDM tabletop work. It is ideal for scenery, dice towers, deck accessories, inserts and prototype parts. Matte PLA is especially painter-friendly because it hides minor layer lines and reflects less light on a gaming table.
For terrain that will live in a hot car or get knocked about at events, PETG may be the better call. It is tougher, but it is not automatically the right upgrade for every print. More stringing and a slightly glossier finish can mean extra cleanup, and terrain does not always need that added durability.
Colour matters more than many newcomers expect. Grey, black or neutral filament makes it easier to spot print defects before priming. If you are printing a functional organiser that will stay unpainted, choose a colour you will be happy to see on the shelf every day. Bright filament can look terrific for dice trays and accessories, while stone-grey is a reliable choice for terrain.
Setup Matters More Than Fancy Features
A reliable first layer is worth more than a long feature list. Before starting a large terrain project, print a small calibration piece and inspect it closely. Poor bed adhesion, incorrect nozzle height, loose belts or damp filament will become far more obvious on a 20-hour castle wall.
Keep filament dry and stored in sealed containers where possible. Moisture can cause popping, rough surfaces and weak prints, particularly with more moisture-sensitive materials. It is a small bit of workshop discipline that prevents plenty of frustration.
Supports deserve planning too. FDM supports can leave marks, and resin supports can damage fine areas if positioned badly. Rotate a model so supports sit on less visible surfaces, and avoid placing them across faces, symbols or key scenic detail. The first setup may take a few minutes longer, but it can save an hour of sanding and repair later.
For longer prints, think about the practical risk. A full build plate of miniatures or a massive terrain piece looks efficient, but one failure can waste a lot of material. When learning a new filament or file, begin with a smaller test print. Once the settings are proven, scale up with confidence.
From Fresh Print to Table-Ready Piece
Printing is only the first stage. FDM parts may need brim removal, support cleanup and light sanding. Resin parts need washing, support removal and a full cure before they are safe to handle and prime. Take your time around thin swords, antennae and decorative elements. A rushed support removal can turn a successful print into a repair job.
Primer is the bridge between a print and a convincing painted model. A filler primer can help soften minor FDM layer lines on terrain, although it may obscure detail if applied too heavily. For gaming scenery, a black or dark brown undercoat followed by drybrushing is fast, forgiving and effective. Add a few contrasting details, patches of weathering or tufts, and even a simple print gains personality.
If you are printing functional parts, test the fit before committing to a full batch. Card storage is unforgiving: a tray that fits unsleeved cards may be useless for premium double-sleeved decks. Print a short section, check it with the exact sleeves and boxes you use, then adjust the file or slicer settings if required.
A Better First Project Than a Display Miniature
A highly detailed character miniature is tempting, but it is not always the best first print. Choose something useful, small and forgiving: a paint pot holder, a dice tray insert, a terrain barricade, a card divider or a simple objective marker. These projects teach bed adhesion, supports, orientation and cleanup without demanding perfection.
Once those basics feel familiar, move onto modular terrain or a small squad of miniatures. Keep notes on settings that work for each material and nozzle size. The goal is not to memorise every setting. It is to build a repeatable process that leaves more time for gaming, painting and making.
A good print does not need to be the most complicated thing on the table. If it makes setup quicker, gives your battlefield more character or helps keep a favourite collection protected, it has earned its place in the hobby.