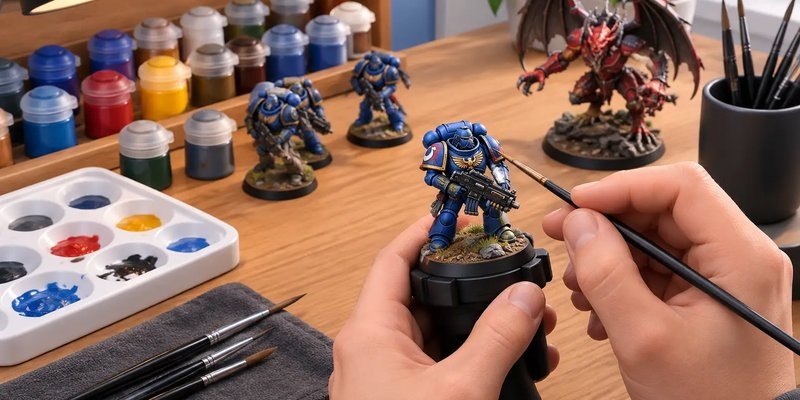
How to Paint Warhammer Miniatures at Home
Your first painted squad does not need to look like a Golden Demon entry to look great on the table. A clean army with clear colours, shaded recesses and a finished base has real presence across a battlefield - and it is far more achievable than it first appears. Learning how to paint Warhammer miniatures is mostly about using the right order of operations, keeping your paint under control and accepting that every model is practice.
Whether you are building a Combat Patrol, starting a Spearhead force, or painting a single character for your Dungeons & Dragons campaign, the goal is the same: make the miniature read clearly from arm's length, then add detail where it matters most.
Start with a sensible hobby setup
You do not need a studio full of gear to begin. A well-lit table, a cup of water, paper towel and somewhere safe to leave models to dry will do the heavy lifting. Good natural light is ideal, but a bright desk lamp with a neutral bulb makes a big difference when you are trying to tell black from very dark blue.
For a first project, gather a plastic cutter, mouldline scraper or hobby knife, plastic glue for plastic kits, a spray or brush-on primer, a medium brush, a small detail brush, a larger brush for drybrushing, paints and a palette. A wet palette is a worthwhile upgrade, especially in warmer Australian weather, because it slows drying and helps keep your colour mixes usable.
Use sharp tools carefully and always cut away from yourself. If you are new to assembly, take an extra minute to test-fit parts before applying glue. A shoulder pad facing the wrong way or a weapon arm glued too high is frustrating once the paint is on.
Prepare the miniature before you paint
Paint will make every missed mouldline more obvious, so preparation is not glamorous but it matters. Clip each part from the sprue with a little plastic still attached, then trim that nub back carefully. Scrape or sand visible mouldlines from helmets, weapons, shoulder pads and smooth armour panels.
Wash resin or 3D-printed miniatures in warm water with a small amount of dishwashing liquid before priming. This removes release agent, oils and sanding dust that can stop paint adhering properly. Let them dry completely.
Think about sub-assemblies before you glue everything together. Most rank-and-file Warhammer miniatures are easiest to paint fully assembled. However, a cloak pressed against a torso, a shield covering a face, or a vehicle crew member inside a cockpit can justify painting components separately. Do not create sub-assemblies just because you can - handling many loose pieces can turn a relaxing project into a fiddly one.
Prime for the finish you want
Primer gives acrylic paint something to grip and establishes the overall brightness of the model. Black primer is forgiving and excellent for dark armour, metallics and heavily shadowed armies. White or light grey primer makes bright yellows, reds, bone and pale skin easier to paint. Grey is the reliable middle ground for most beginner projects.
When spraying, shake the can thoroughly, use short passes from about 20 to 30 centimetres away, and keep the model moving. You want a thin, even coat that preserves detail, not a thick layer that fills facial features and chainmail. Humidity can affect spray primers, so avoid painting outdoors during very damp weather or extreme heat.
A zenithal undercoat is a useful next step: prime black, then spray white or light grey from above. It creates instant guidance for shadows and highlights, particularly if you plan to use contrast-style or speedpaint-style paints. It is fast, but it does not replace tidy brushwork on flat armour panels.
How to paint Warhammer miniatures in layers
The simplest dependable workflow is basecoat, shade, layer and highlight. You can use it on almost any faction, from grimy Death Guard armour to crisp Stormcast Eternals plate.
Apply thin basecoats
Put a small amount of paint on your palette and add a little water. The paint should flow from the brush without leaving a thick ridge, but it should not be so watery that it runs into recesses. Aim for two thin coats rather than one heavy coat. The first may look patchy - that is normal. Let it dry, then apply the second.
Start with the largest areas: armour, robes, skin or vehicle panels. Then paint secondary colours such as weapons, belts, pouches and trim. Finish with small focal details including lenses, eyes, purity seals and icons. Working from broad areas to fine details makes mistakes easier to fix.
You do not have to paint every tiny panel in a different colour. A Space Marine, for example, can look excellent with armour, metallic weapon parts, a single accent colour and a contrasting lens colour. Restricting your palette also makes an army look coherent.
Shade the recesses
A wash or shade paint settles into cracks and texture, adding depth with minimal effort. Load the brush, apply it across the relevant section, then use a clean brush to soak up any large pool forming on a flat surface. If it dries in a puddle, it can leave an unwanted coffee-stain mark.
Brown shades work well over gold, bone, leather and many warm colours. Black shades give steel, gun casings and darker armour more definition. For clean, bright models, use a shade carefully in recesses rather than flooding the whole panel. It depends on the finish you want: a weathered Ork vehicle benefits from messy grime, while a parade-ready Adeptus Custodes force usually needs more control.
Restore colour, then highlight edges
After shading, repaint the raised areas with your original base colour, leaving the darker shade visible in the recesses. This is called layering, and it creates a crisp result without requiring complicated blending.
Edge highlighting is where armour and weapon details start to pop. Use a lighter version of the base colour, remove excess paint from the brush, and gently run the side of the brush along sharp edges. Focus on the helmet, shoulder pads, knee plates, weapon casing and most visible folds. A few deliberate highlights look better than trying to outline every edge with a shaky line.
For textured surfaces such as fur, stone, chainmail and tank tracks, drybrushing is quicker. Wipe most paint from a broad brush until it seems almost dry, then lightly brush across the raised texture. Build it up gradually. Drybrushing is brilliant for bases and terrain, but it can look dusty on smooth power armour if overused.
Make faces, metals and lenses work harder
These small features draw the eye, so they deserve a little extra time. For skin, start with a mid-tone, add a controlled shade around the eyes and mouth, then place a lighter colour on the nose, cheekbones and brow. At tabletop distance, a simple highlight reads better than attempting tiny realistic eyes.
For metallics, paint silver or gold as a base, shade it, then add a bright silver highlight to the sharpest points. Metallic paints can separate in the pot, so give them a thorough shake. Keep a separate water pot for metallics if possible, as glittery residue can contaminate other colours.
Lenses and gems look effective with a dark colour at the top, a brighter colour toward the bottom and a tiny pale dot as reflected light. Do not worry if the first few look uneven. A neat, bright dot placed consistently across a unit creates the effect your eye expects.
Finish the base and protect your work
An unfinished black base can make a well-painted miniature feel incomplete. Texture paint, sand, cork, small rocks and tufts all work, but choose one battlefield story for the army. Ash waste, red desert, ruined city and green woodland bases each create a distinct visual identity.
Paint the rim in a consistent neutral colour unless your gaming group or event has a specific basing standard. Once the model is completely dry, a matte varnish can protect it from regular handling. Gloss varnish is tougher and useful for lenses, slime or wet effects, but it is usually best applied selectively because it can make armour look toy-like.
If you are picking up paints, brushes, basing materials and your next boxed set in one visit, CardTastic Collectables and Gaming can help keep the hobby pile focused rather than random.
Build skill one miniature at a time
Avoid stripping a whole unit because the first model did not match the image in your head. Keep it as a marker of where you began. Paint five or ten models with the same recipe, and you will notice cleaner coats, steadier highlights and faster decisions by the end of the batch.
The best way to improve is to finish models, put them on the table and enjoy the reaction when an opponent asks where you got your army painted. Keep your next miniature within reach, choose one technique to practise, and let the collection grow colour by colour.